This guide explains how to create a digital VCard in Neyrova, add contact information, social media profiles, and configure access settings for your card.
VCard is a digital business card containing your contacts, links, and social media profiles. You can share it with clients, partners, or use it in QR codes so people can easily connect and interact with you in one convenient place.
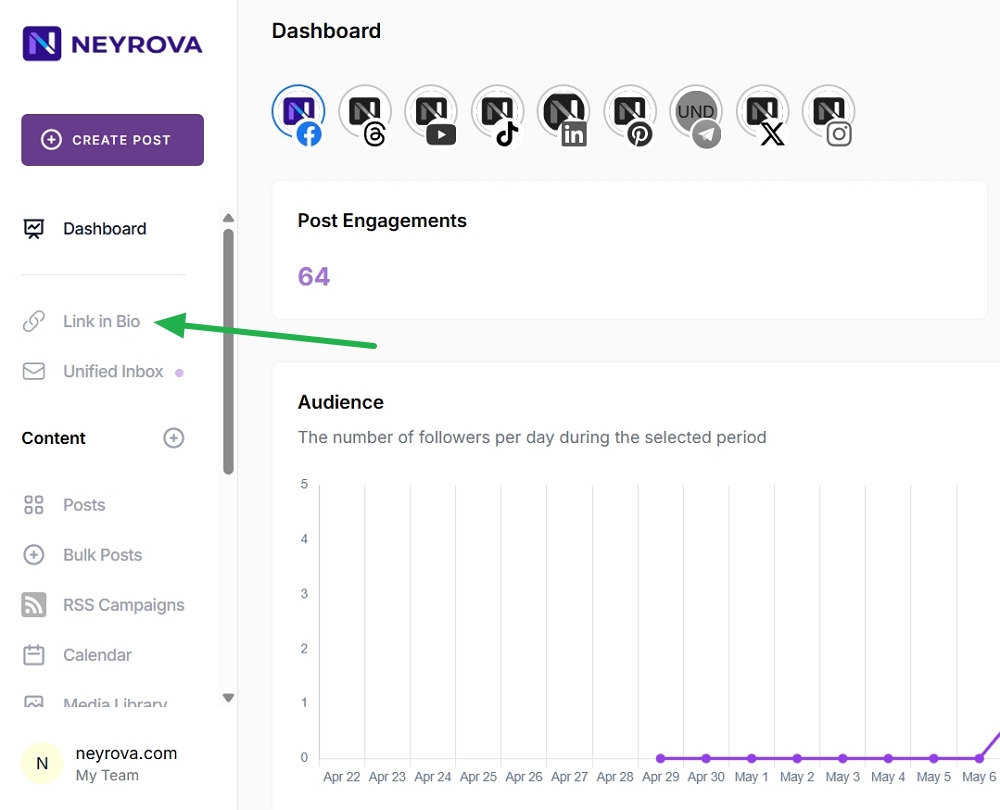
1. Open the Link in Bio section
Log in to your Neyrova dashboard and navigate to the Link in Bio section.
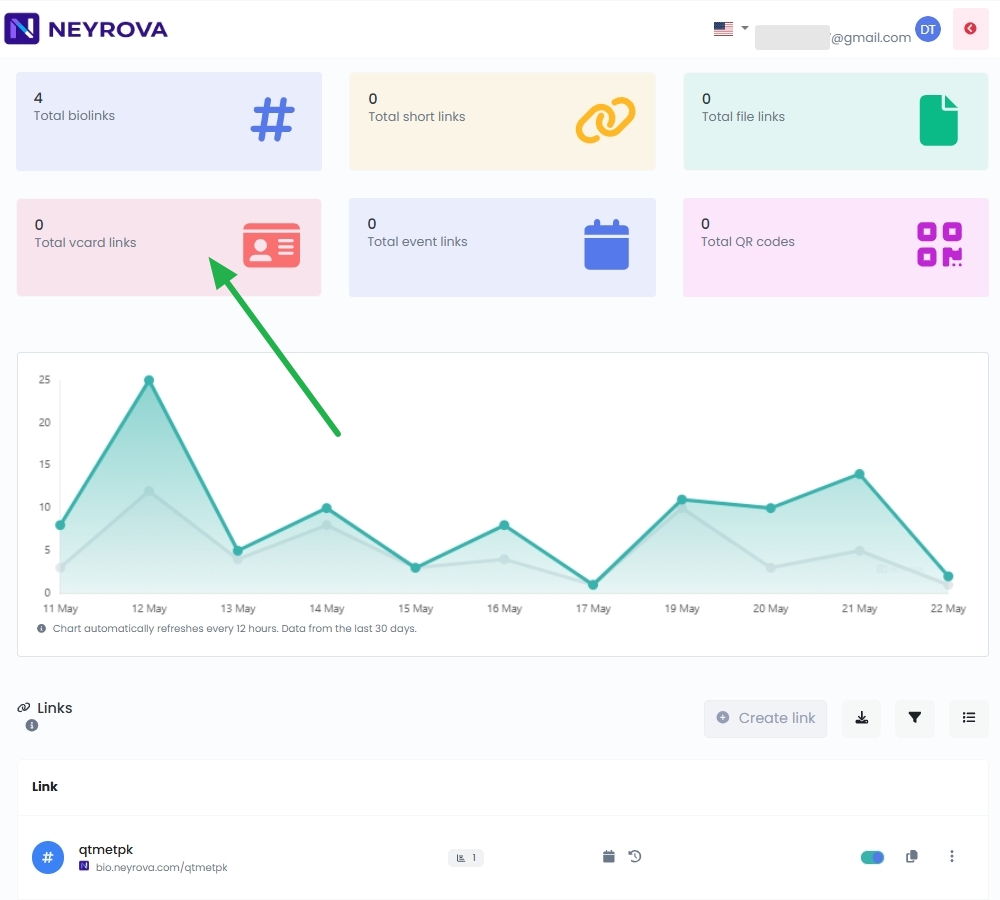
2. Create a new link
2.1 Click the card icon.
2.2 Click the vCard Link button.
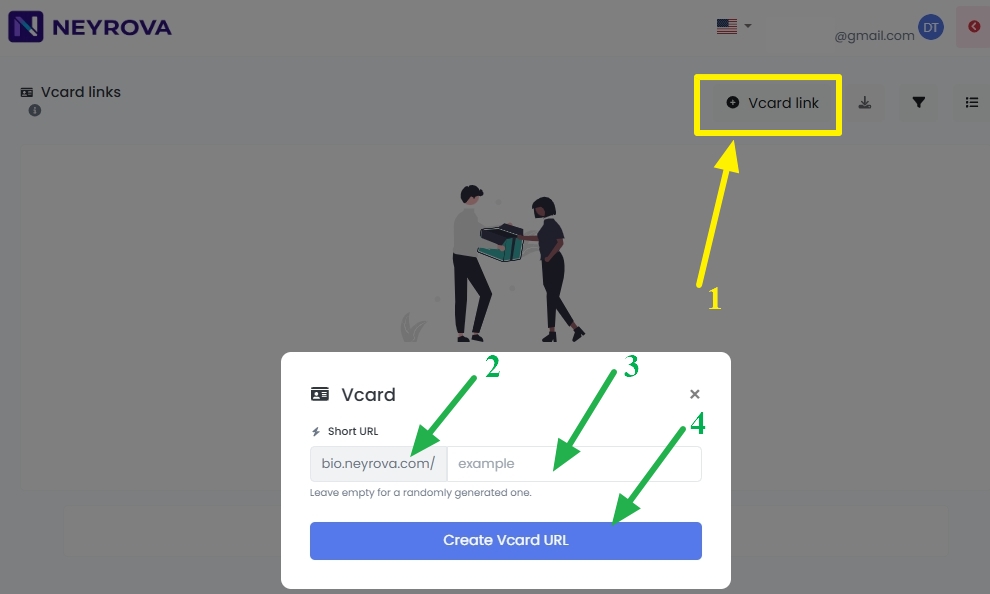
Short URL — enter your preferred short address (for example: bio.neyrova.com/Neyrova-VCard).
- You can enter your name, nickname, company name, or brand name — any unique identifier that will be recognizable to your clients.
- If you leave this field empty, the system will automatically generate a random link (for example: bio.neyrova.com/x7k9p).
2.3 Click the blue Create Vcard URL button to create your unique VCard link.
3. Fill in your card details
After creating the link, the VCard settings page will open.
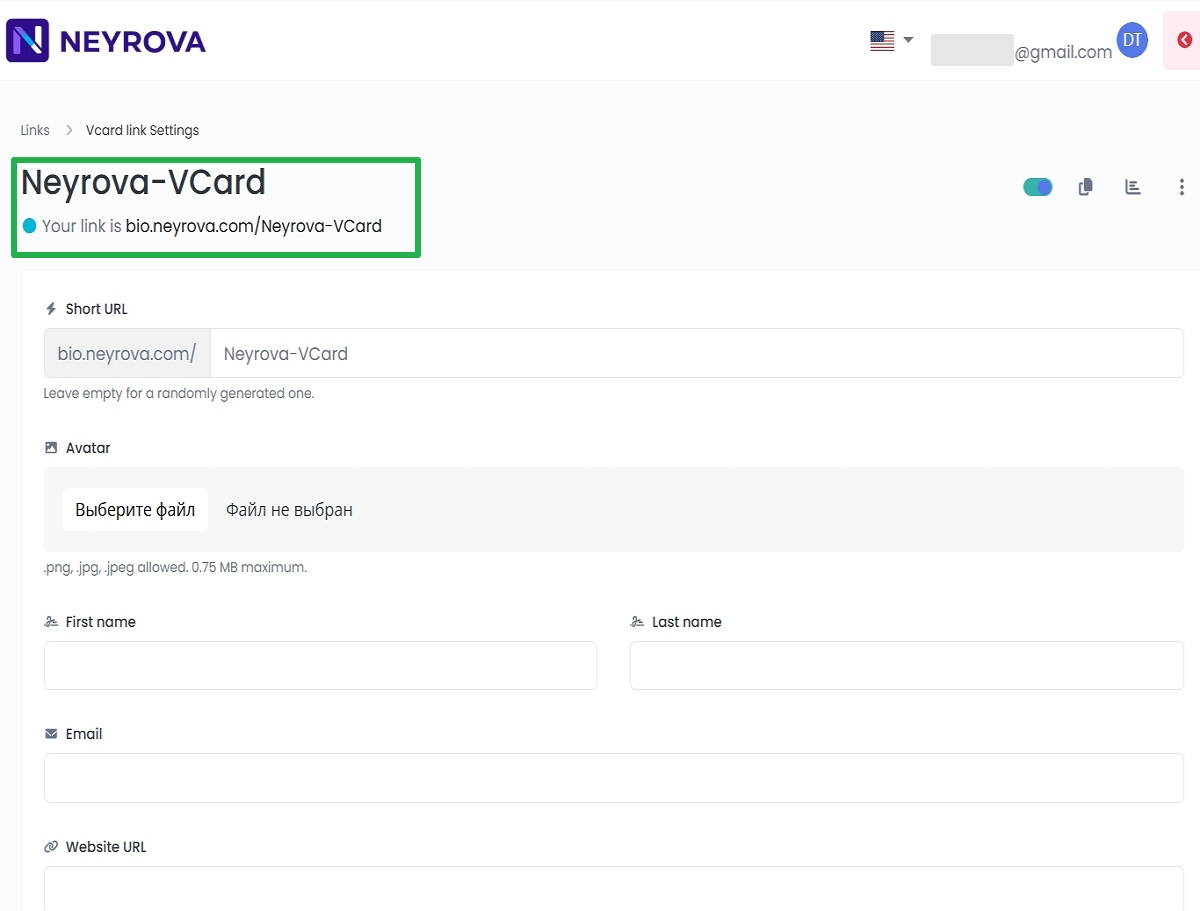
3.1 Add the main card information:
- Avatar — upload a photo or logo in .png, .jpg, or .jpeg format (up to 0.75 MB). This will be your visual identity on the digital card.
- First name and Last name — enter your name so visitors can see who the card belongs to.
- Email — add a business or personal email address for quick contact.
- Phone numbers — add your phone number.
- Website URL — provide a link to your website or another important page.
- Company — company name.
- Job title — your position.
- Birthday — date of birth in DD.MM.YYYY format.
- Street address — street and house number.
- City — city.
- ZIP — postal code.
- Region — state, province, or region.
- Country — country.
- Note — additional notes or comments.
3.2 Add your personal or business phone number
Leave the Label field empty to use the default label generated by the phone. Custom labels do not work on Android devices.
Click Create if you need to add multiple phone numbers.
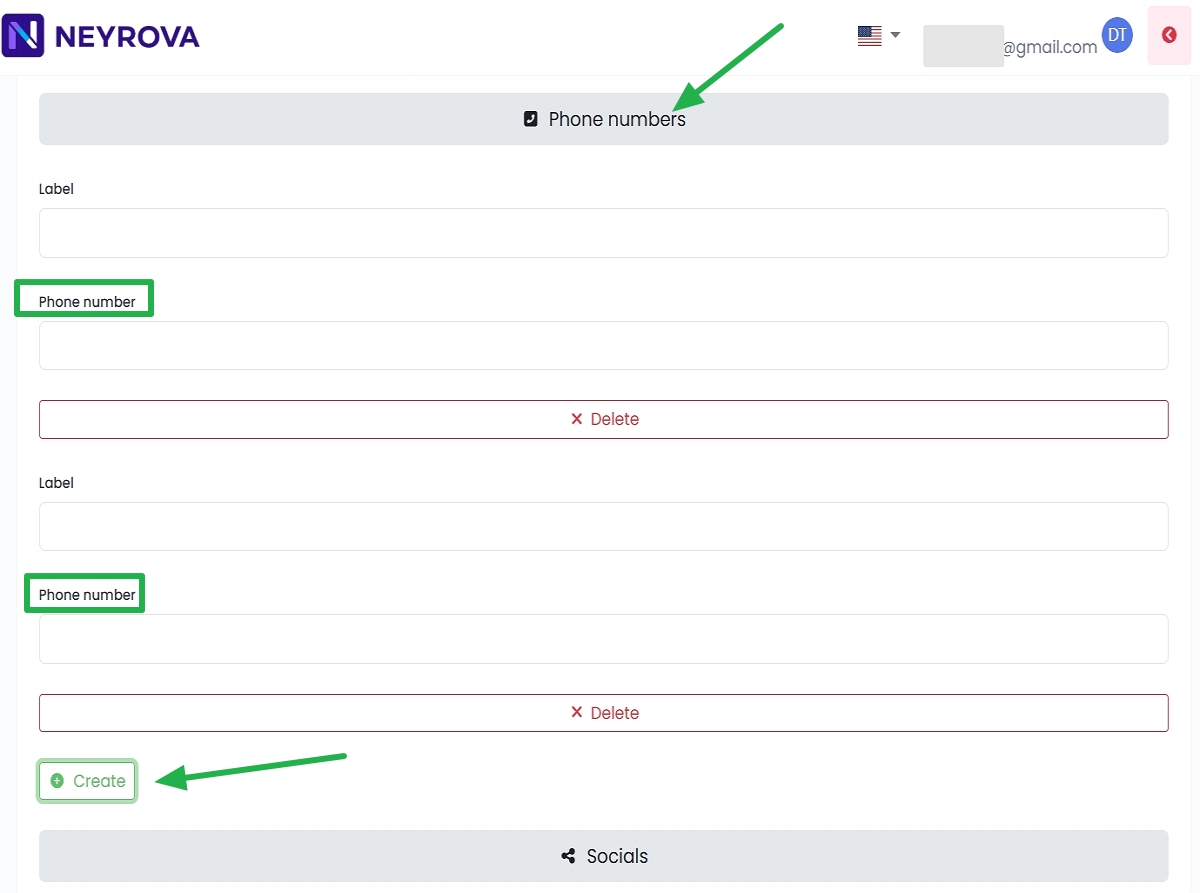
3.3 Add social media profiles
Open the Social section to add your social media profiles.
Enter links to the accounts you want displayed on your digital business card.

Label — enter the name of the social network or service (for example, Facebook, Instagram, LinkedIn).
URL — paste the full profile or page address (for example, https://www.facebook.com/username).
If you need to add multiple social media profiles, click Create.
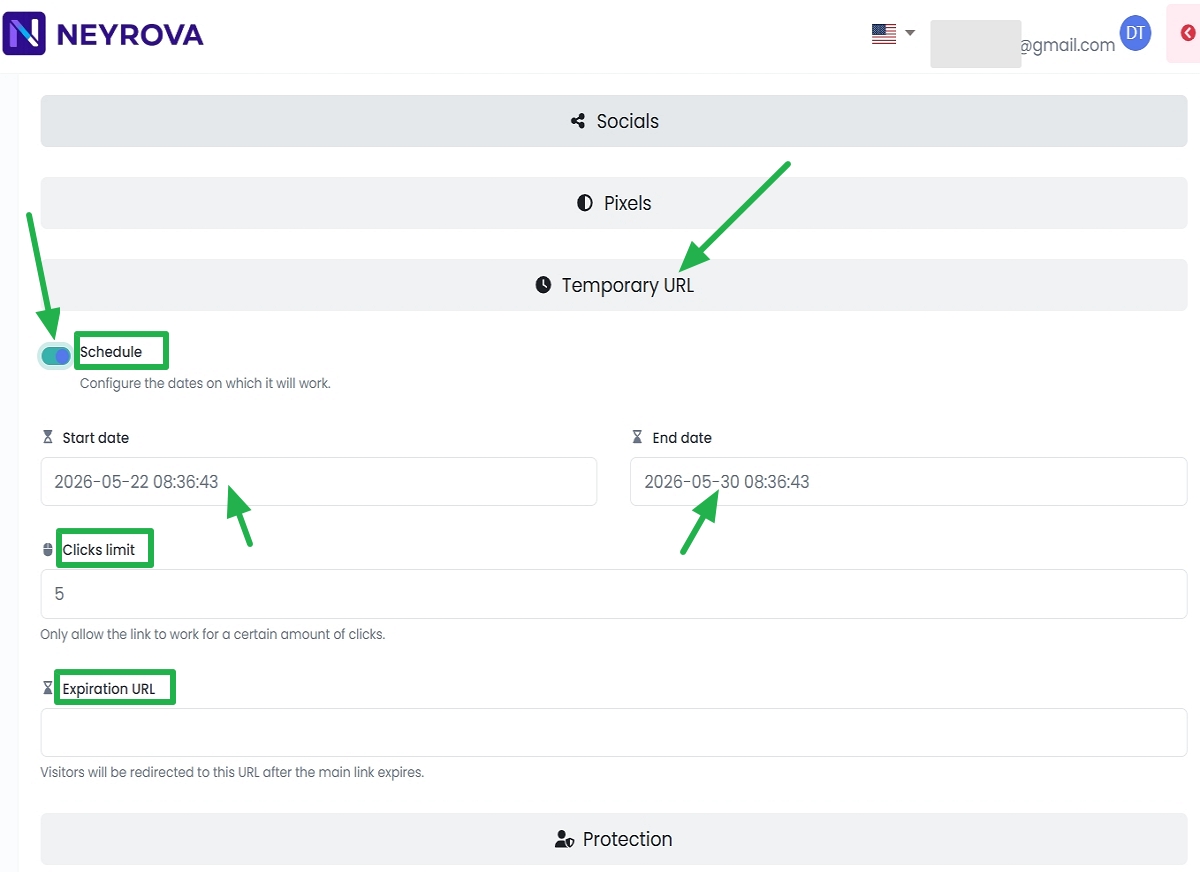
4. Configure a Temporary URL (optional)
If you want to limit the period during which your card is accessible, configure a Temporary URL.
4.1 Enable scheduling using the Schedule toggle and define the period during which the VCard will be available.
4.2 Configure a click limit
Clicks limit — optionally enter the number of clicks after which the link will stop working.
In this field, you specify a number (for example, 5).
This number represents the maximum number of visits allowed through the link.
Once the limit is reached, the link will stop working. If an Expiration URL is specified, users will be redirected there. If not, the system will display a message indicating that the link is unavailable.
Expiration URL — enter the address where visitors will be redirected after the main link expires. The main link is generated in the Short URL field (see section 2).
5. Set a password
Password — enter a password in this field.
Every user who opens the link must enter this password to gain access. This is useful when you want to restrict access to specific people only, such as for a private business card, demo version, or protected content.
Sensitive content warning — enable this option if the link contains content that may be sensitive or inappropriate; users will see a warning before accessing it.
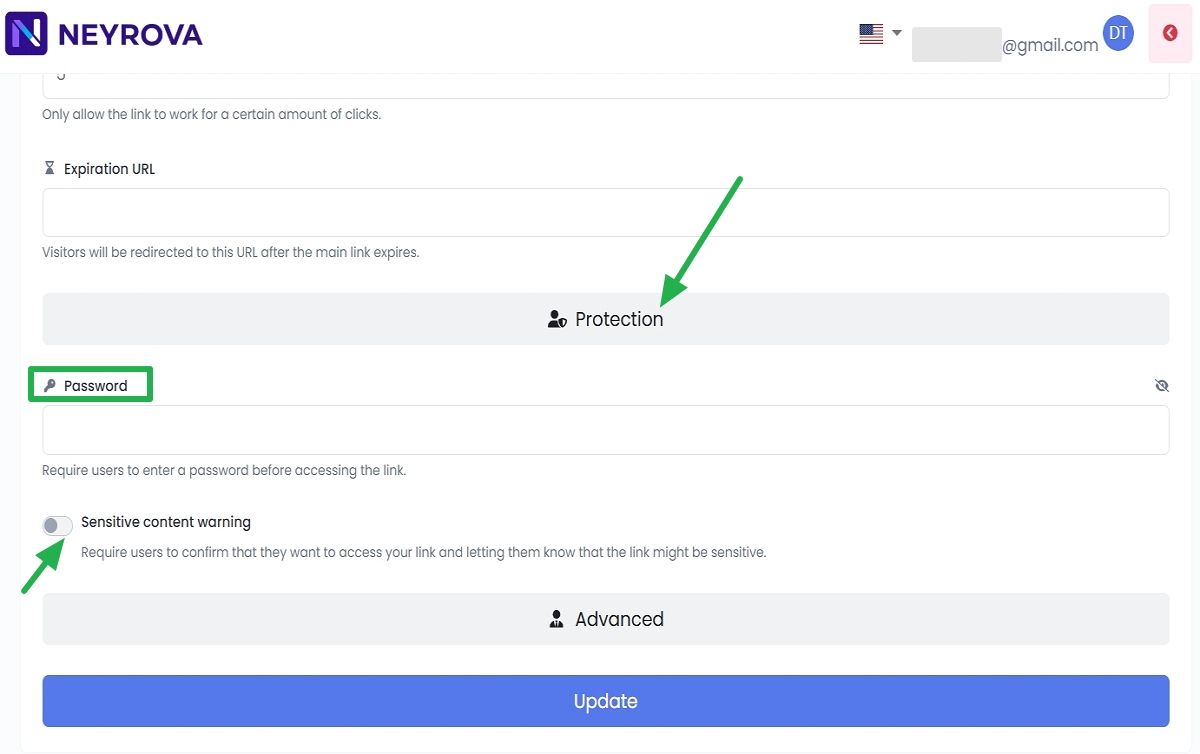
6. Save your settings
After completing the setup, click Update.
Summary
A VCard in Neyrova is a permanent digital business card containing your contacts, photo, email, and website. It remains available until you delete it.
Temporary URL is an additional access mode that can also be applied to a VCard. It allows you to make the card temporary by setting active dates, limiting clicks, adding a password, or redirecting visitors after expiration.
If you are creating a permanent business card, it is recommended to provide a Website URL so visitors can access your website. If you are creating a temporary card using Temporary URL, you may omit the Website URL and instead use the Expiration URL field for redirection after expiration.
Once configured, your card is ready to use: you can share it directly, add it to your social media profiles, or use it together with a QR code.