This guide explains how to create a QR code in Neyrova, configure its type, add the required information, and download the finished image.
QR codes can be used for quick access to a page, virtual business card, website link, or other digital resources.
1. Sign In to Your Neyrova Account
Enter your login credentials and open the Neyrova dashboard.
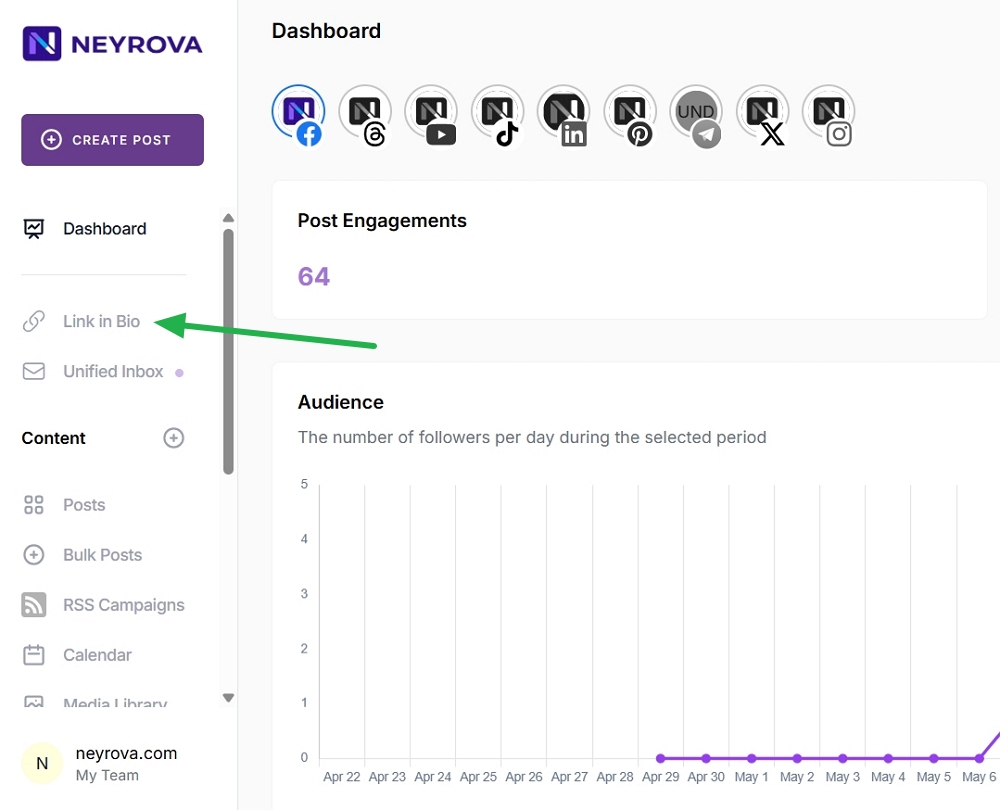
2. Open the Link in Bio Section
In the dashboard, navigate to the Link in Bio section.
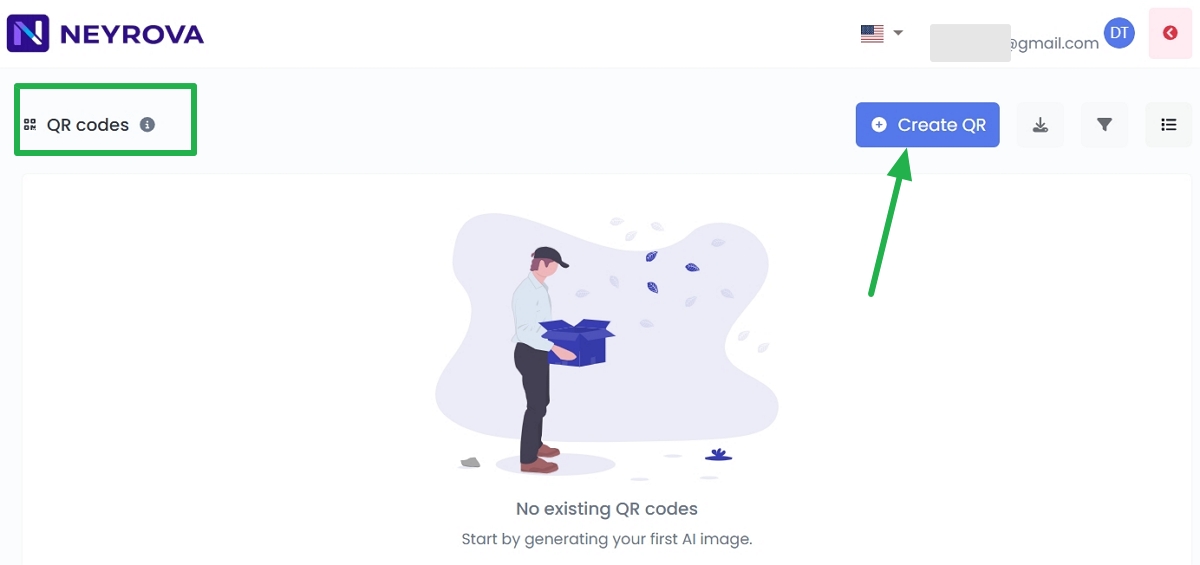
Then open the QR Codes section.
3. Click Create QR
In the QR Codes section, click Create QR to create a new QR code.

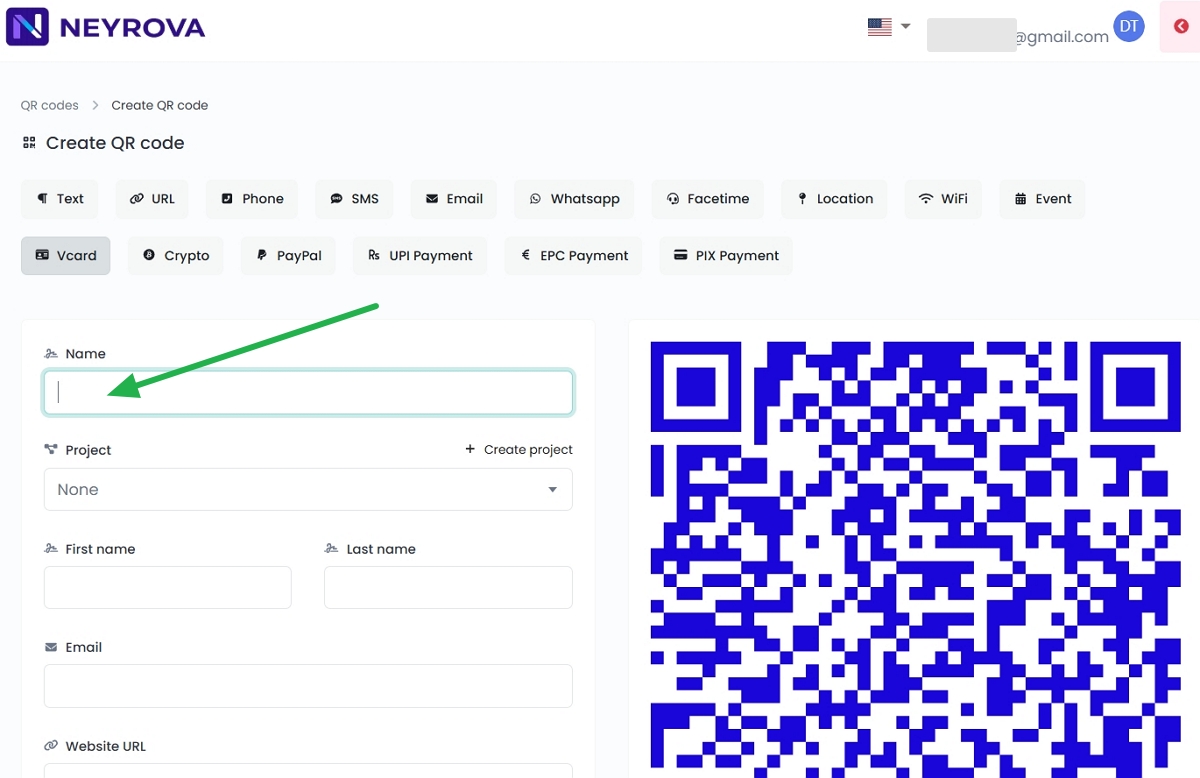
4. Enter a QR Code Name
Add a name for your QR code so you can easily find it later in the list.
Then select an existing project category or create a new one.
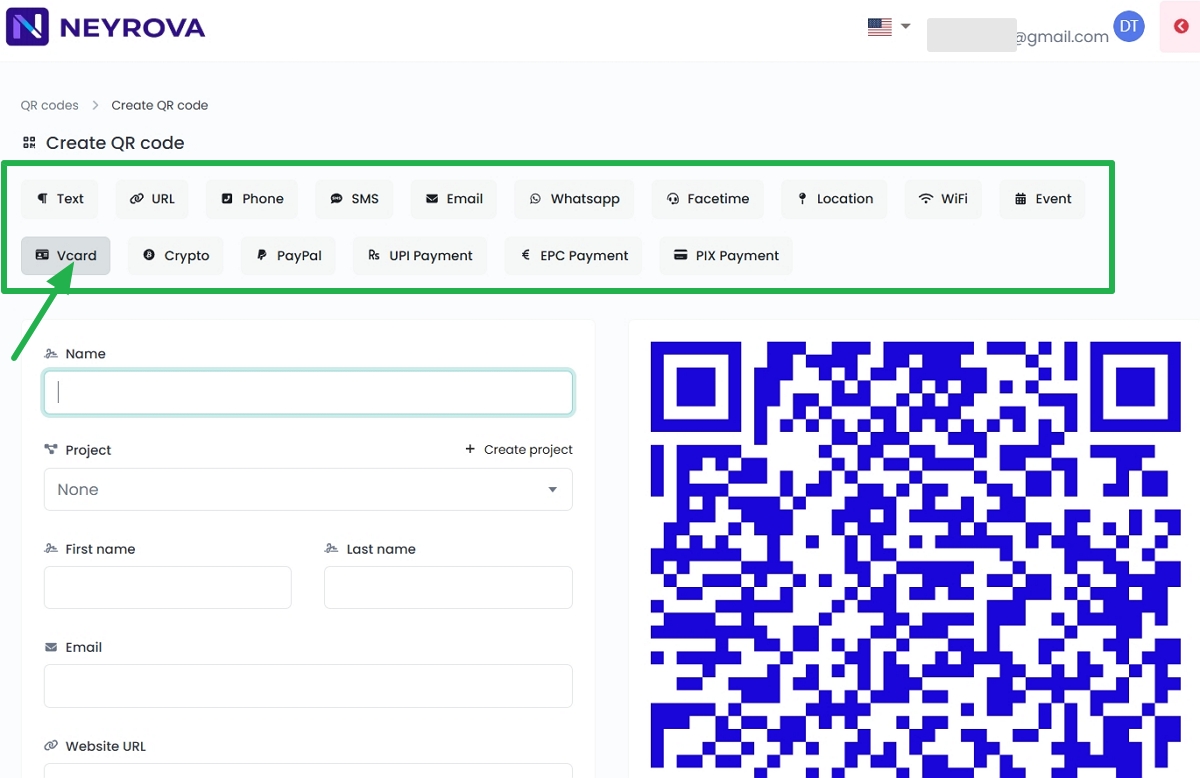
5. Select a QR Code Type
Choose the type of QR code you want to create.
The QR Code Type determines what users will see after scanning the code, such as a virtual card, website link, page, or another supported format.
Several QR code types are available in Neyrova. In this example, select Virtual Card to create a QR code containing contact information and social media links.
6. Fill in the Virtual Card Information
Enter the information you want to include in your virtual card.
6.1 Add Contact Information:
- Project — select an existing project or create a new one;
- First name — enter the first name;
- Last name — enter the last name;
- Email — enter a work or personal email address;
- Phone numbers — add a phone number;
- Website URL — enter a website address;
- Company — company name;
- Job title — job position;
- Birthday — date of birth in DD.MM.YYYY format;
- Street address — street name and house number;
- City — city;
- ZIP — postal code;
- Region — state, province, or region;
- Country — country;
- Note — additional notes or comments.

6.2 Add Your Personal or Business Phone Number
Leave the Label field empty if you want the device to automatically assign a label. Custom labels are not supported on Android devices.
Click Create if you need to add multiple phone numbers.
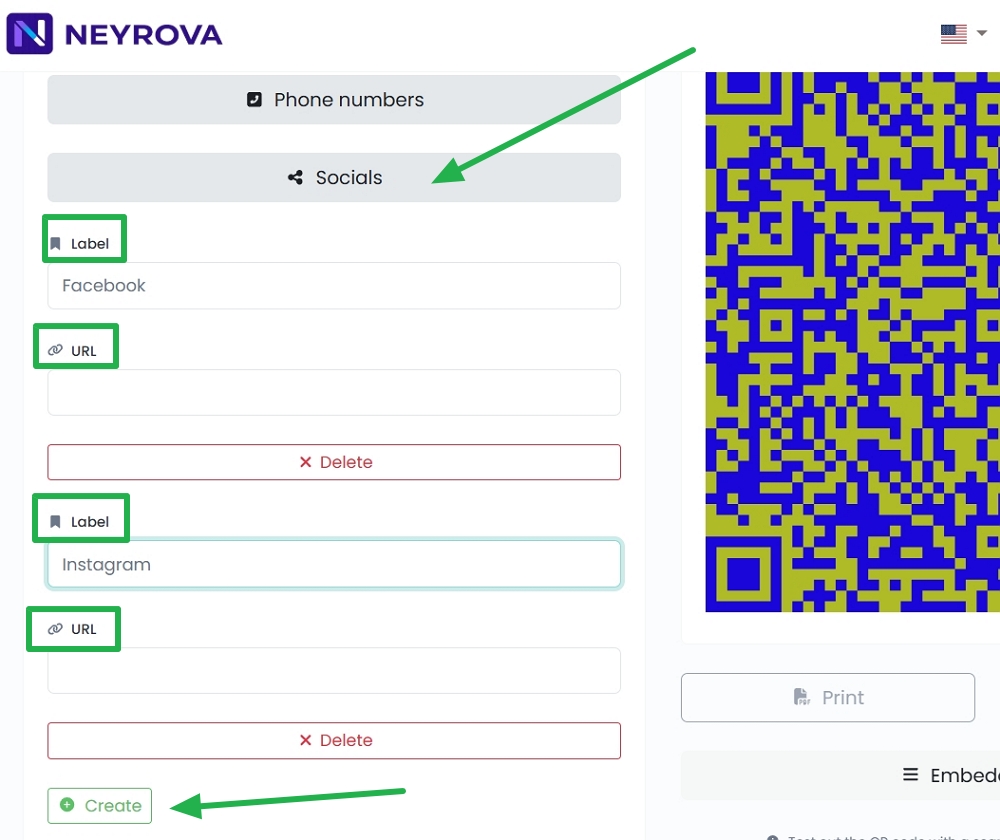
6.3 Add Social Media Profiles That Should Appear After Scanning the QR Code:
Label — enter the name of the social media platform or service, such as Facebook, Instagram, or LinkedIn.
URL — enter the full profile or page URL, for example https://www.facebook.com/username.
If you need to add multiple social profiles, click Create.
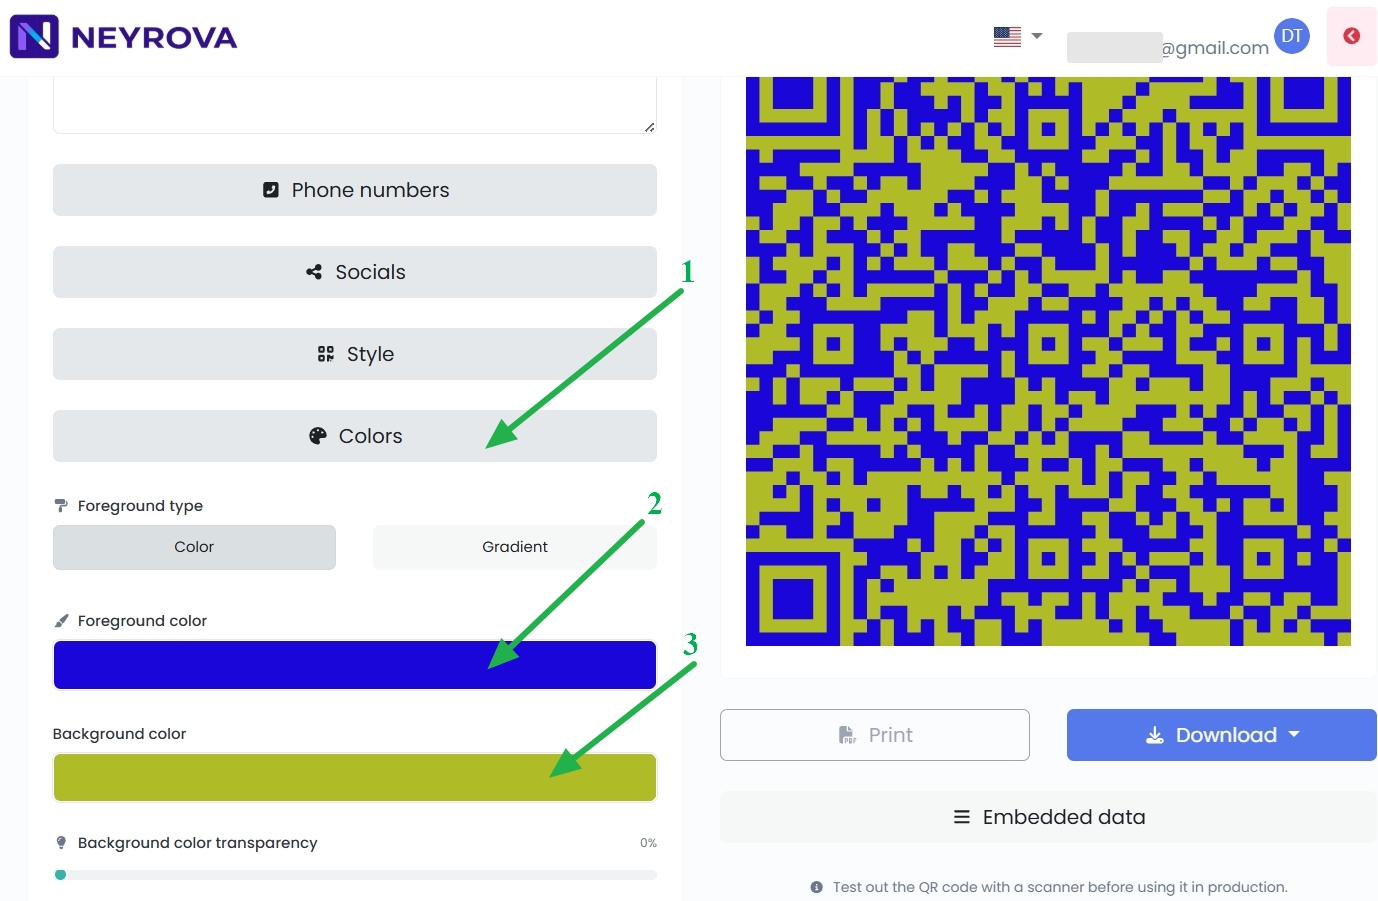
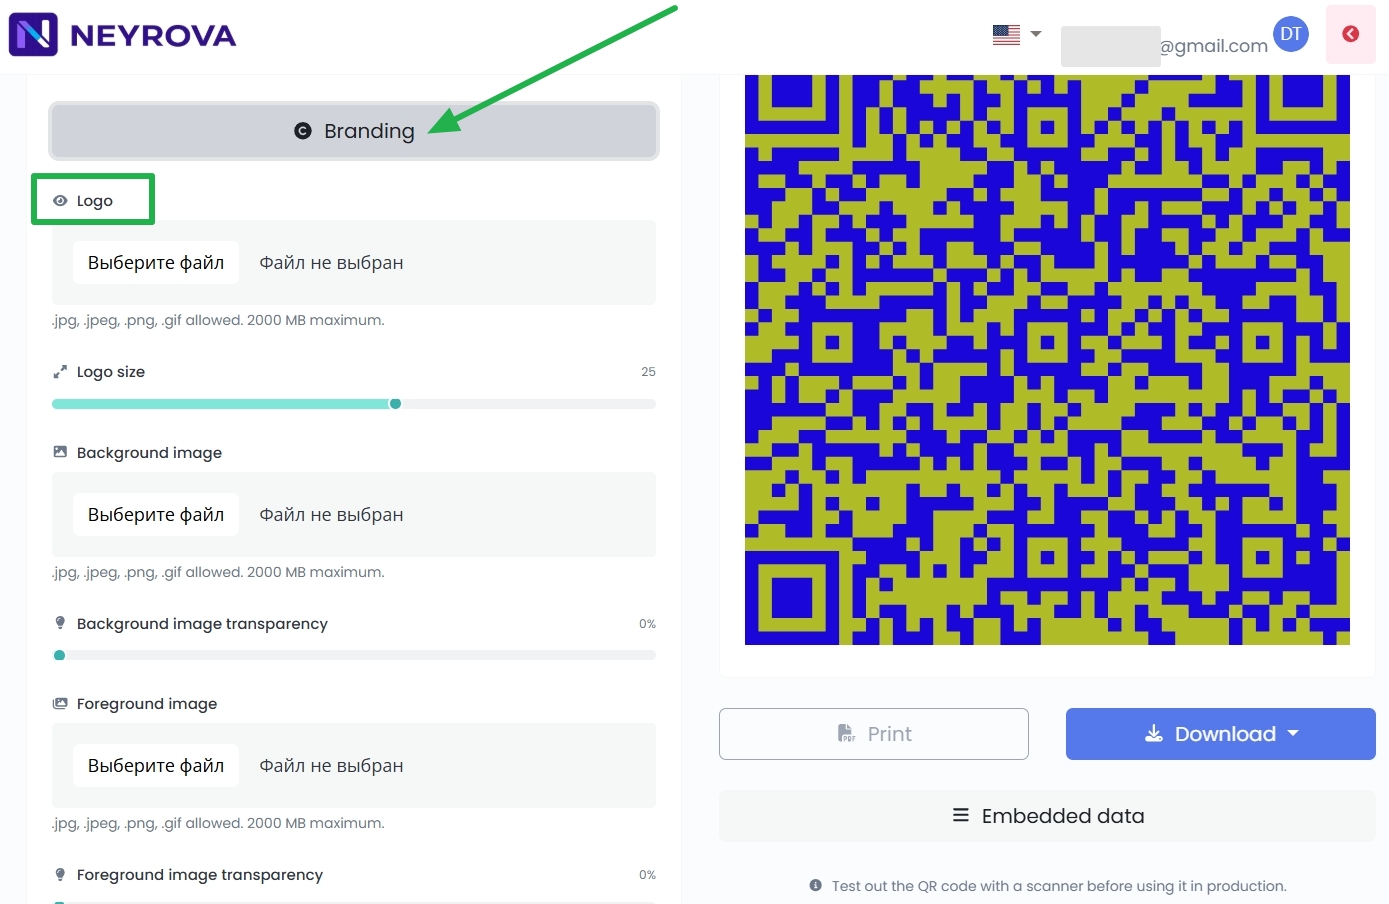
7. Customize the QR Code Appearance
If needed, change the QR code colors and add a logo.
If no customization is required, leave the default settings.
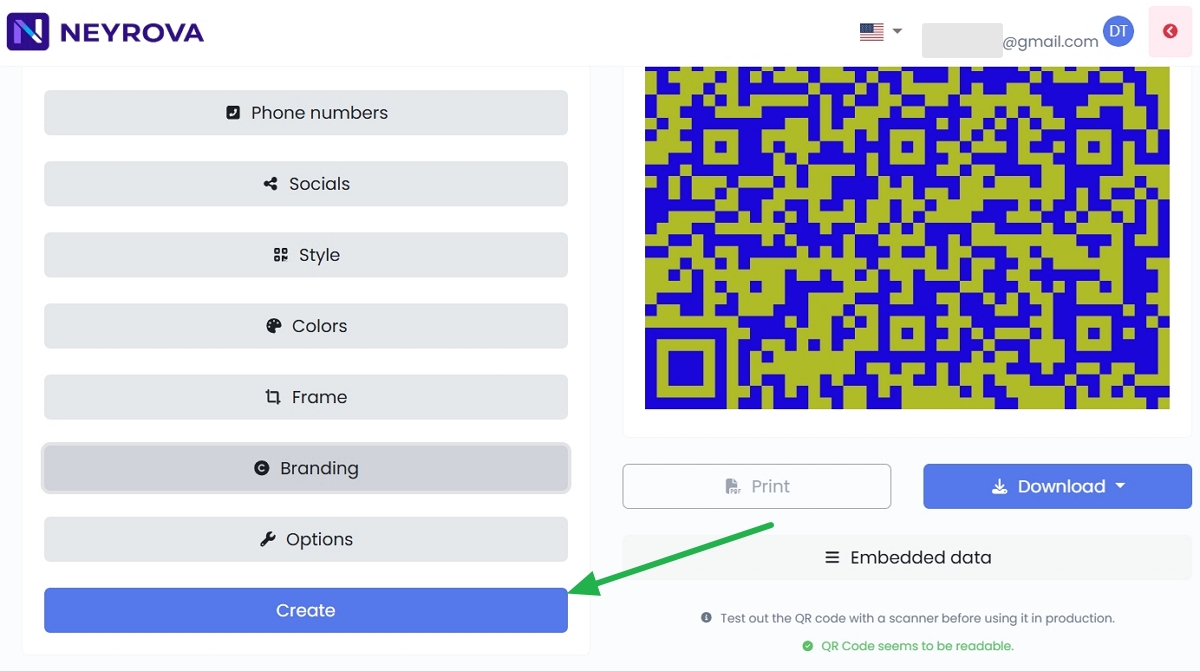
8. Create the QR Code
After entering all required information and customizing the design, click Create.
Neyrova will generate your QR code.
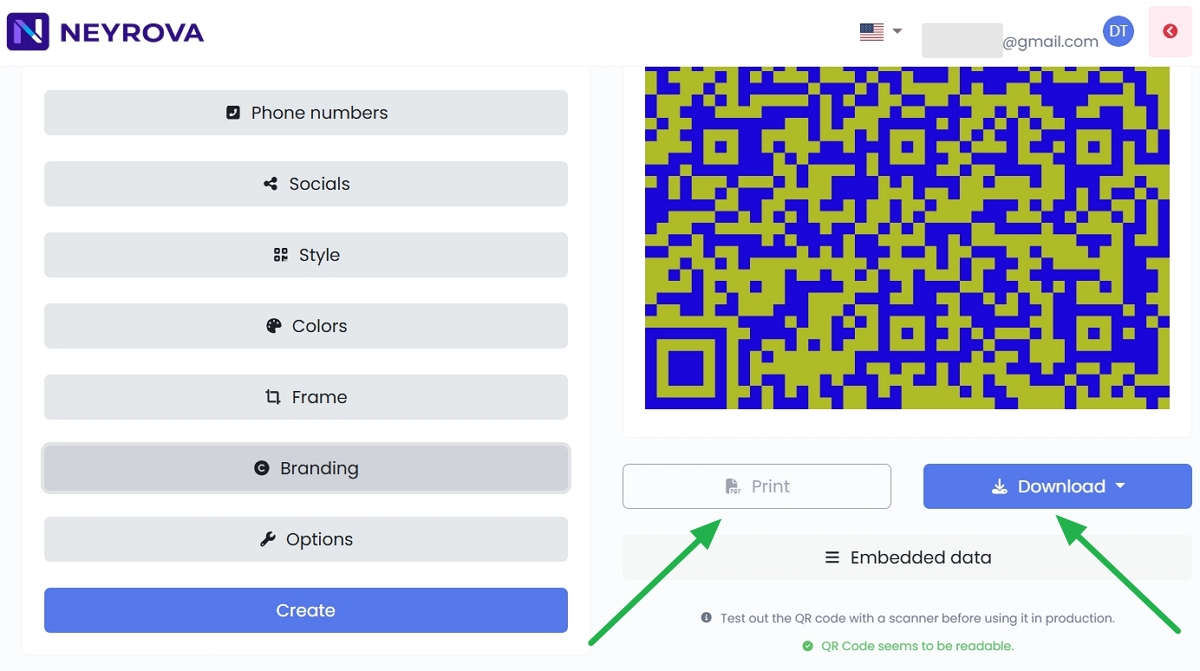
9. Download or Print the QR Code
Once the QR code is generated, you can download it as an image using Download or print it using Print.
Summary
Neyrova allows you to create QR codes for a variety of purposes, including virtual business cards.
You can select the QR code type, add the required information, customize its appearance, and download the finished QR code for use online or in printed materials.