This guide explains how to create, switch, and delete workspaces in Neyrova.
A workspace is a separate environment for managing your team, billing, social profiles, posts, and calendar. This is especially useful if you work with multiple projects, brands, or clients.
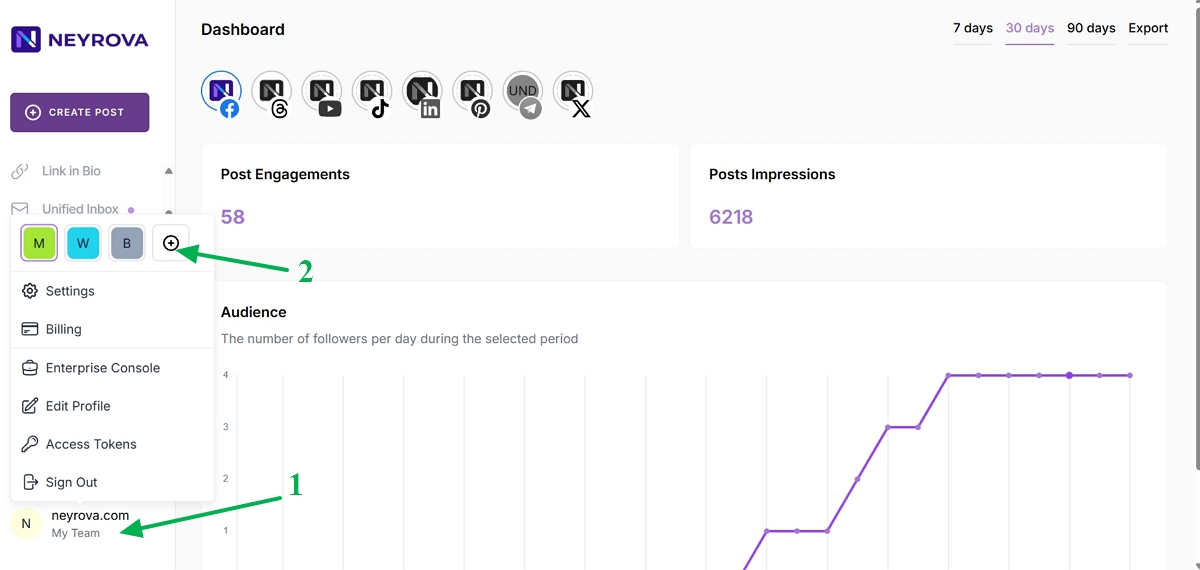
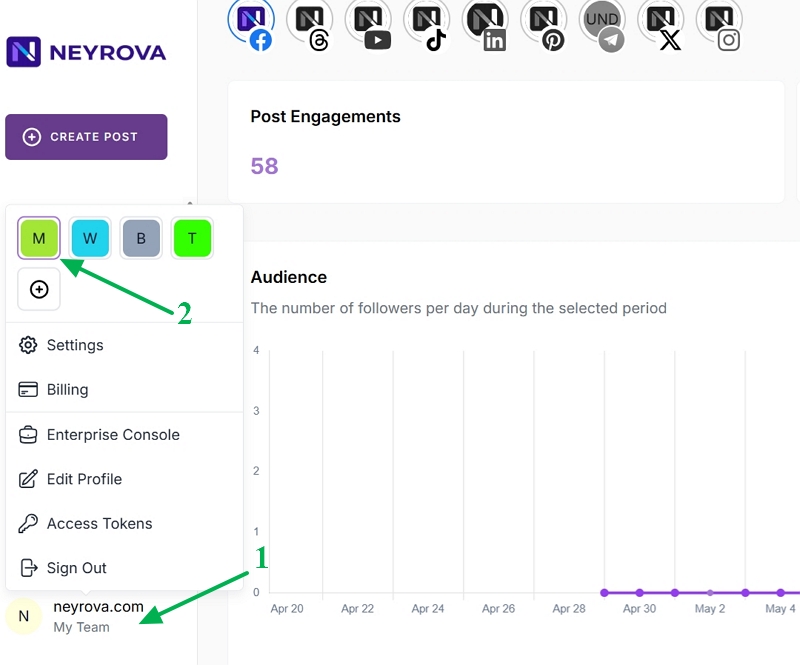
1. Open the User Menu
In the lower-left corner of the Neyrova dashboard, click your name or profile icon.
The user menu will open.
2. Add a New Workspace
In the user menu, click the plus icon to create a new workspace.
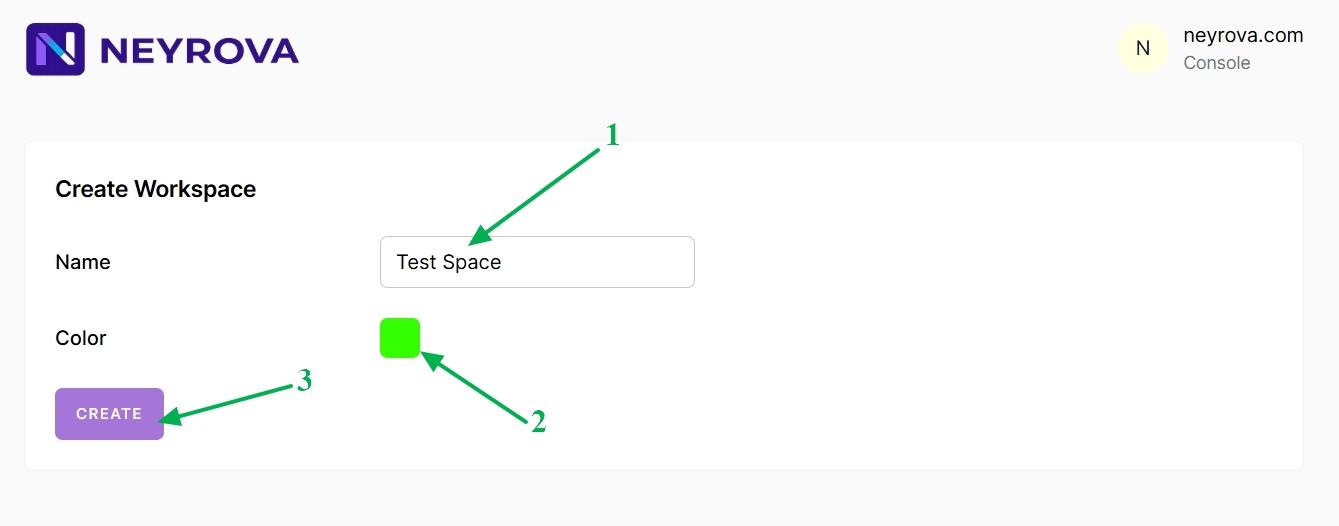
3. Create a Workspace
Enter the name of the new workspace.
Then choose a unique color to make it easier to distinguish from other workspaces.
After entering the name and selecting a color, click Create.
This will create a new workspace in Neyrova.
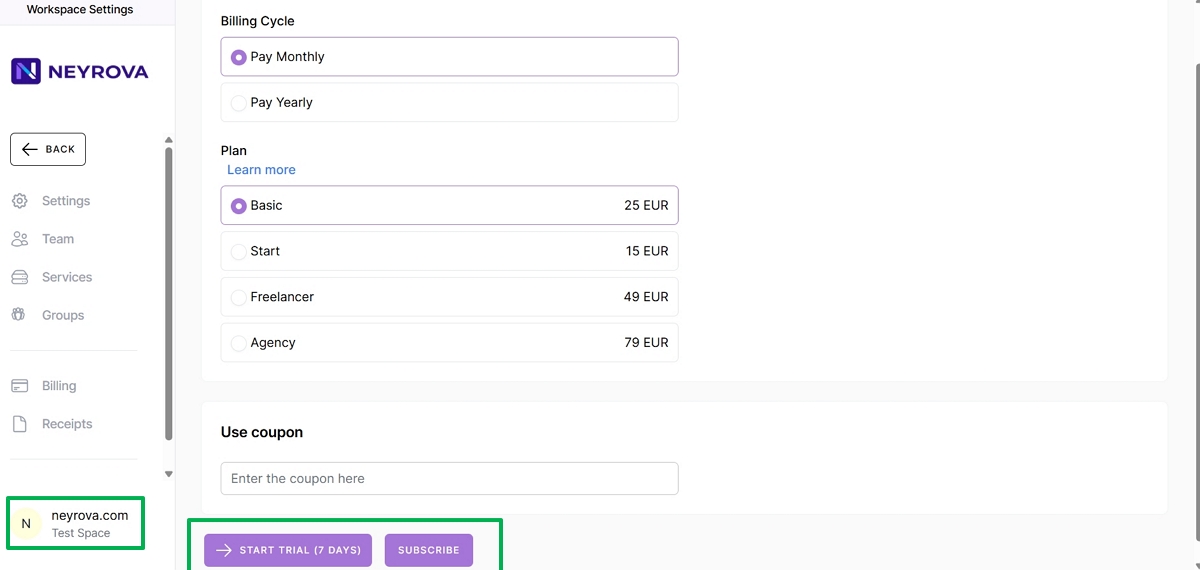
4. Choose a Pricing Plan
At the next step, choose a pricing plan for the new workspace or activate the 7-day free trial.
5. Switch Between Workspaces
To switch between workspaces, open the user menu again.
Select the required workspace from the list.
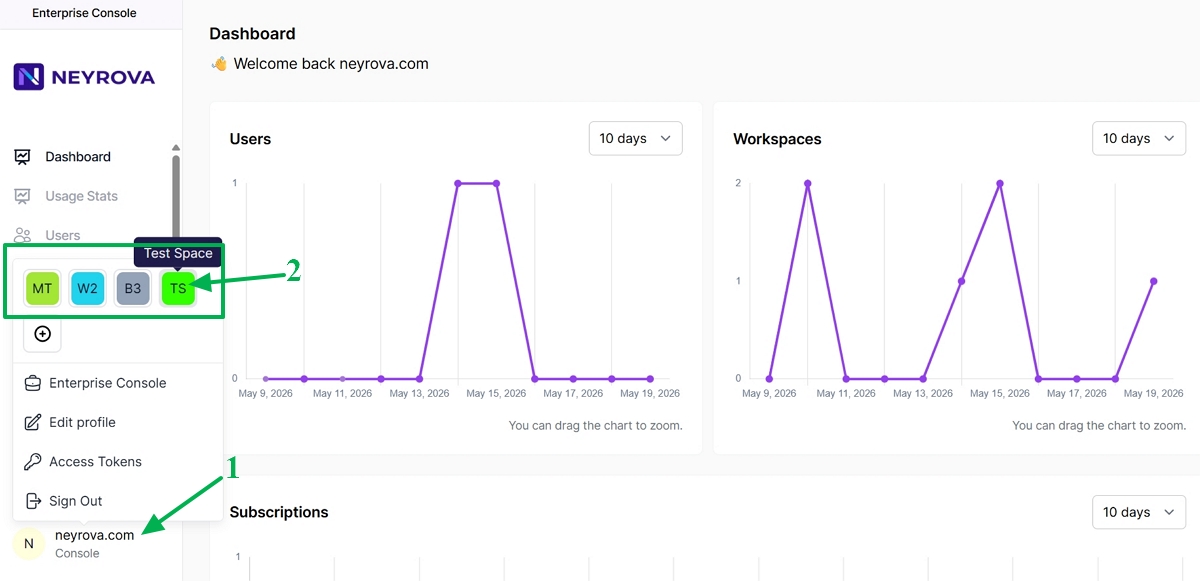
6. Check the Active Workspace
The active workspace is always highlighted with a border.
This allows you to quickly understand which workspace you are currently working in.
7. Open the Workspace You Want to Delete
7.1 Before deleting, make sure you are currently inside the workspace you want to remove.
7.2 In the user menu, select Settings.
7.3 In the settings, open the Security section.
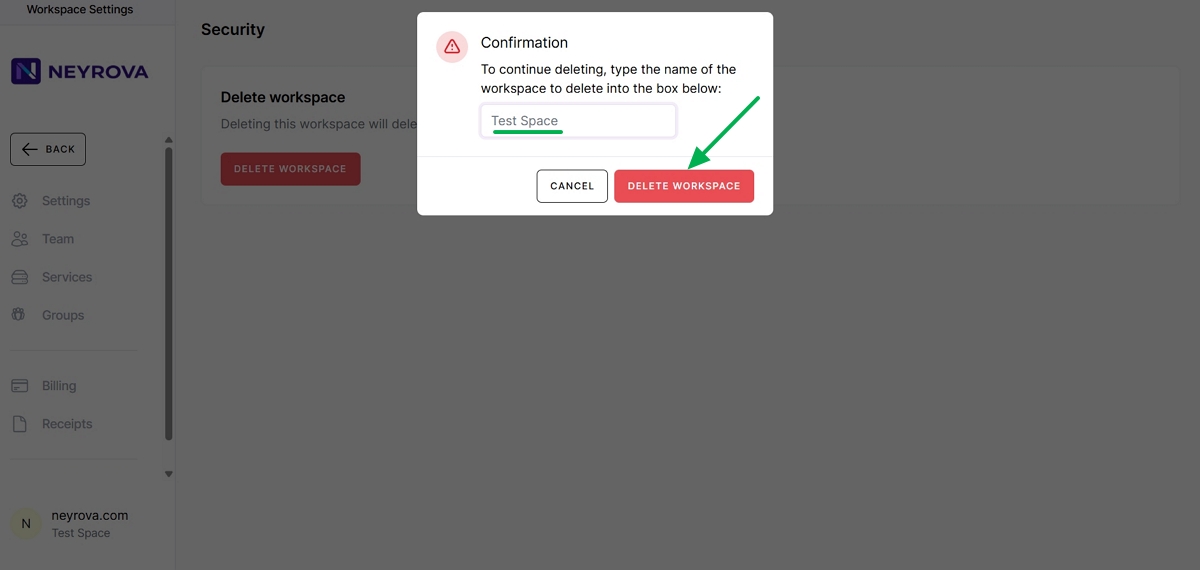
7.4 In the Security section, click Delete Workspace.

12. Confirm Deletion
To confirm deletion, enter the workspace name and click Delete Workspace.
Important
Deleting a workspace permanently removes all related data:
- posts;
- calendar;
- social profiles;
- receipts;
- workspace settings.
This action cannot be undone, so before deleting, make sure the workspace is no longer needed.
Summary
In Neyrova, you can create separate workspaces for different teams, brands, clients, or projects.
You can create a new workspace, choose a pricing plan for it, quickly switch between workspaces, and remove the ones that are no longer used.