This guide explains how to use two collaboration features in Neyrova: post approvals and post activity.
These tools help teams collaborate on content, review posts before publication, and communicate efficiently throughout the content creation process.
1. Open Your Neyrova Account
Sign in to your Neyrova account and open the dashboard.
2. Go to Settings
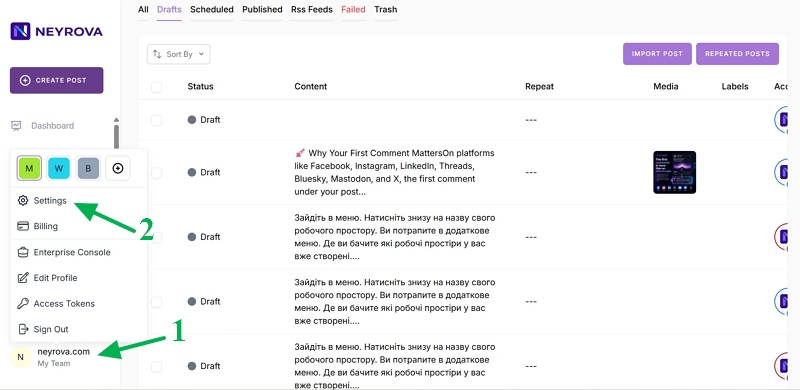
In the lower-left corner of the dashboard, click your profile icon.
From the menu that appears, select Settings.
3. Open the Team Tab
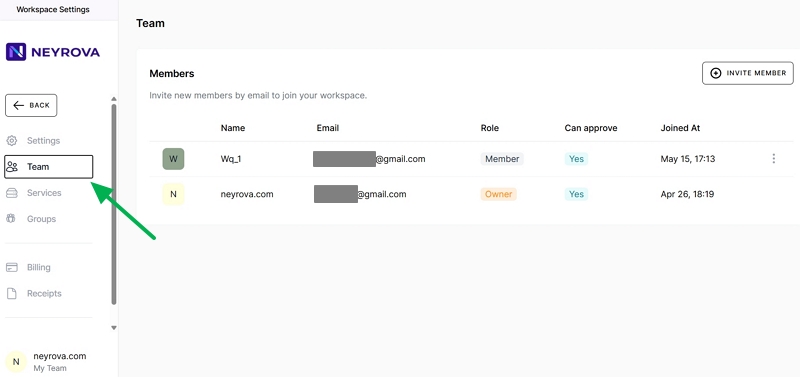
In Settings, navigate to the Team tab.
Here you can manage team members, invite new users, and assign roles.
4. Invite a New Team Member
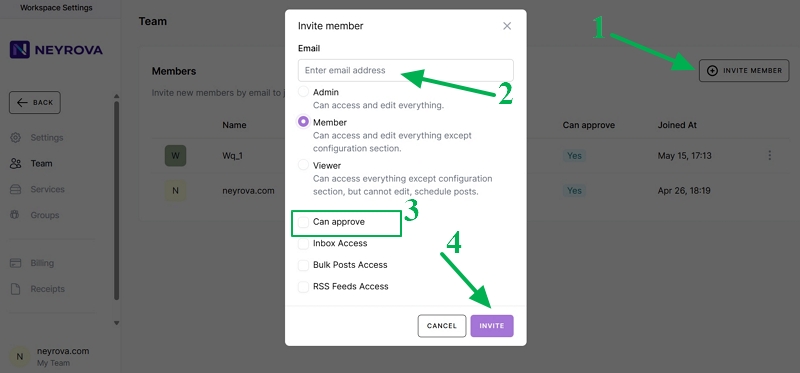
- Click Invite Member to add a new user to your workspace.
- Select a role for the user.
After entering the email address, choose a role for the new team member:
- Admin — administrator;
- Member — team member;
- Viewer — view-only user.
Select the role based on the actions the user should be allowed to perform within the account.
If the user should approve posts before publication, enable the Can Approve permission.
This allows the user to review and approve posts that are awaiting approval.
After selecting the role and permissions, click Invite.
5. Invitation
Wait for the user to accept the invitation sent to their email address.

6. Check the Team List
Once the invitation has been accepted, the user will appear in the team list.
They can now work within the account according to their assigned role and permissions.
7. Create and Schedule a Post
Next, create a new post in Neyrova and schedule it for publication.
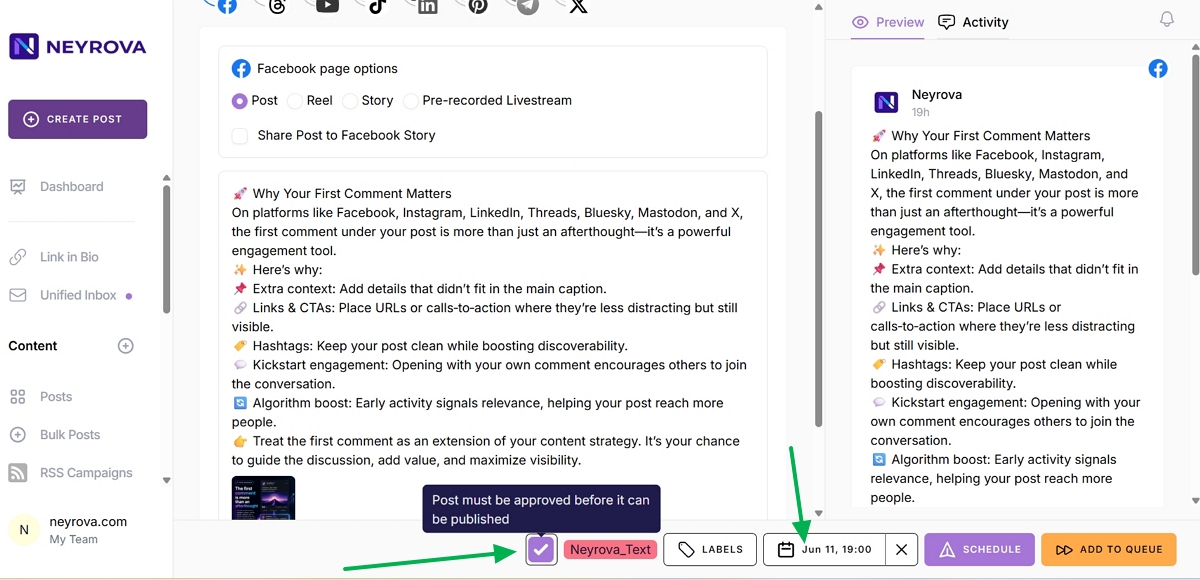
Be sure to enable the option requiring post approval.
Once enabled, the post will receive a pending approval status if approval is required before publishing.
8. Open the Posts Section
An administrator or a user with approval permissions can open the Posts section.
Look for posts with the Needs Approval status.
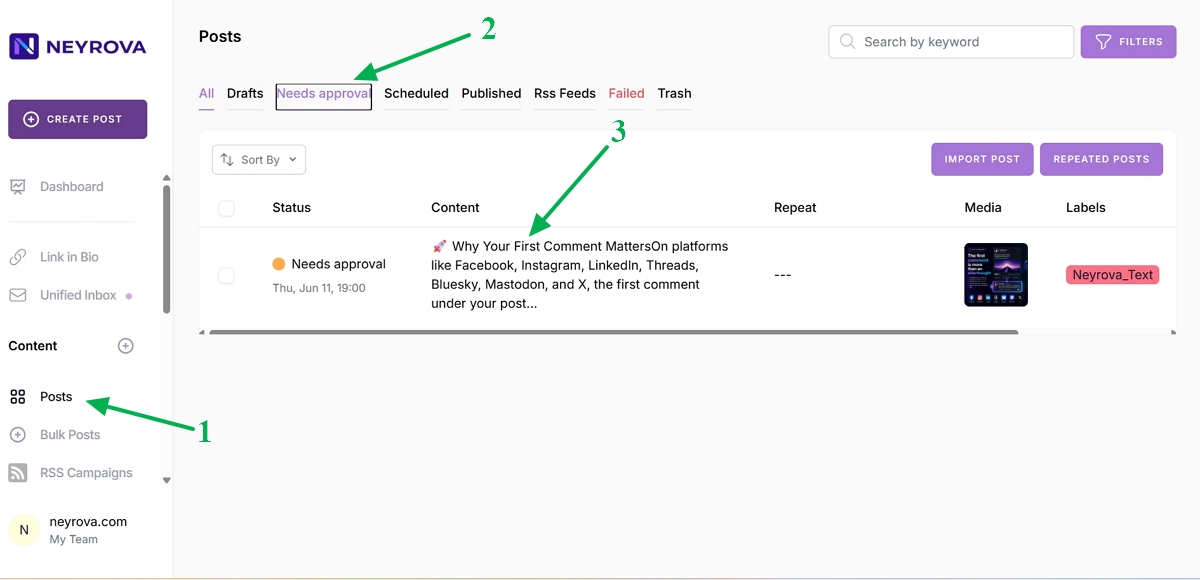
9. Open the Post for Review
Click Edit next to the post you want to review.
This opens the editor where you can review the content before approving it.
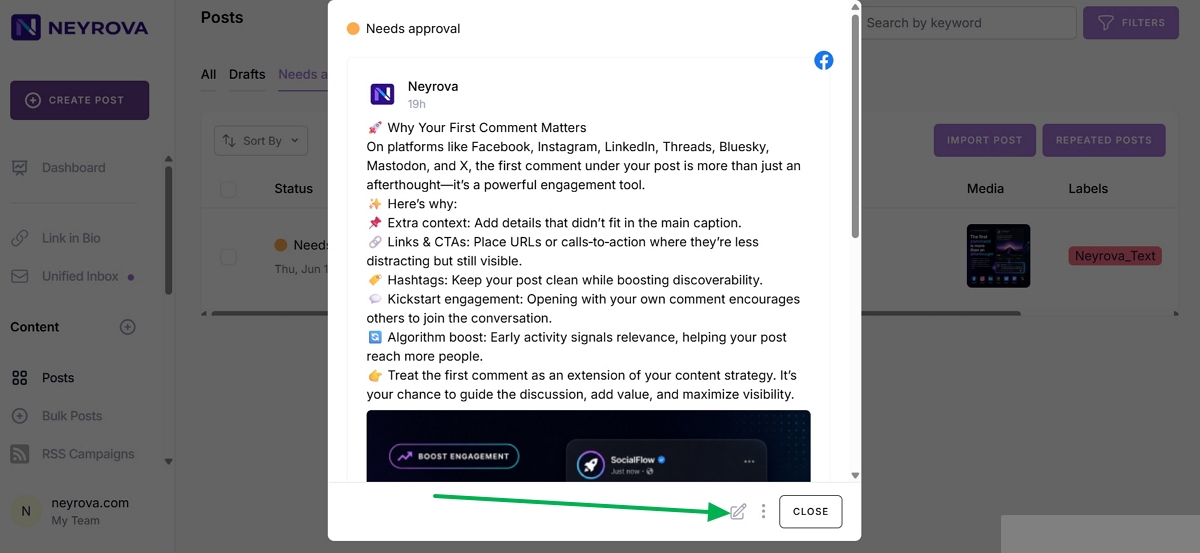
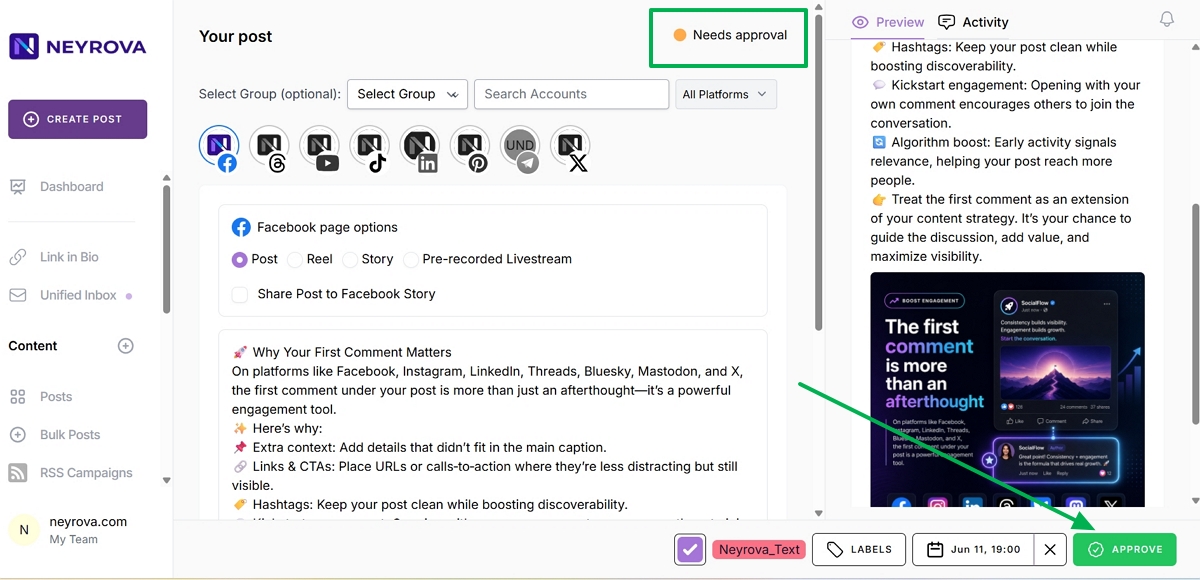
10. Review and Edit the Post
In the editor, you can review the text, replace images, add new content, or edit the publication date.
Before approving, make sure the post is ready to be published.
11. Approve the Post
Once the post has been reviewed and all changes have been made, click Approve.
The post will then be approved for publication.
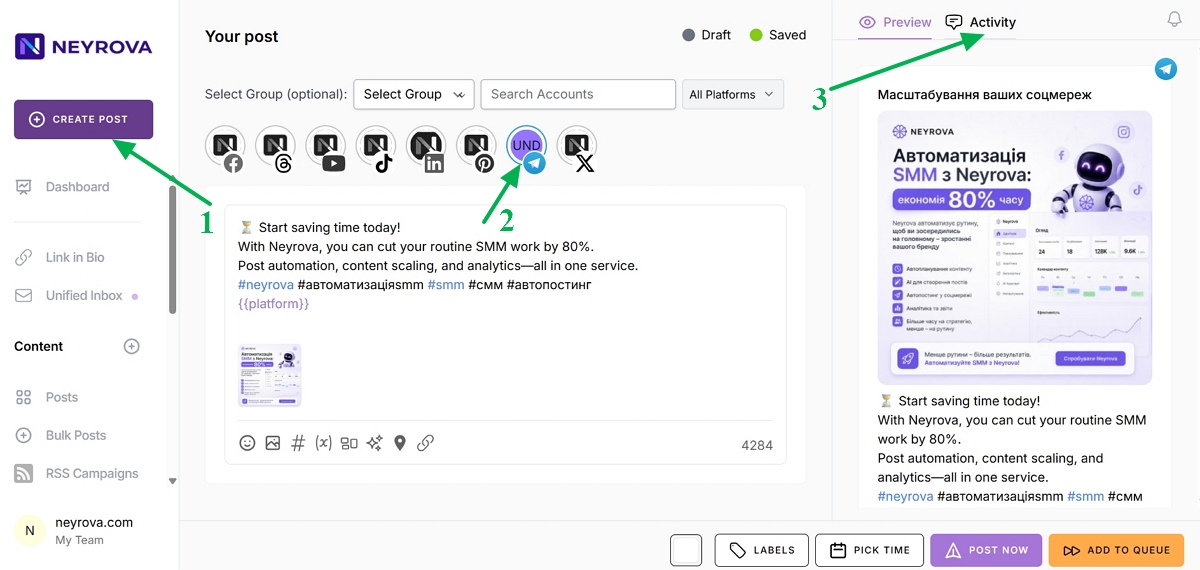
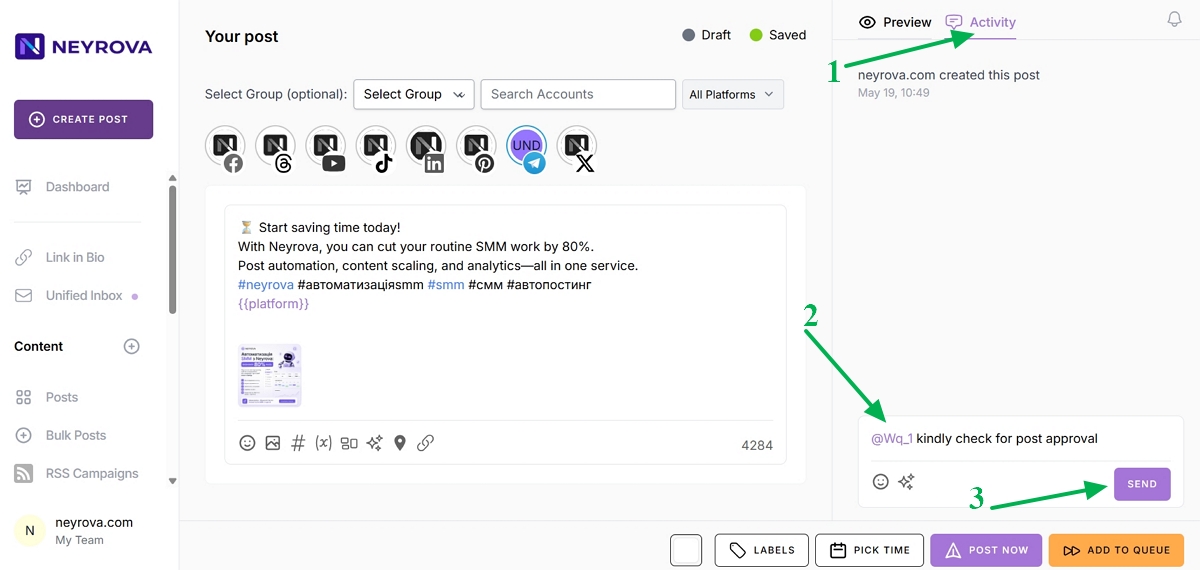
12. Use the Activity Tab for Comments
To streamline teamwork, use the Activity tab located in the upper-right corner next to the Preview feature.
The Activity feature eliminates the need for administrators to manually search for posts requiring approval.
Team members can leave comments and mention administrators or other responsible users.
13. Mention a Team Member in a Comment
In the Activity tab, write a comment and mention the administrator or responsible user who should review the post.
This is a quick way to request a review, discuss edits, or draw attention to a specific detail.
14. Check Email Notifications
After mentioning a user, the system will send an email notification containing a link to the post.
The administrator or responsible team member can open the post directly from the email.
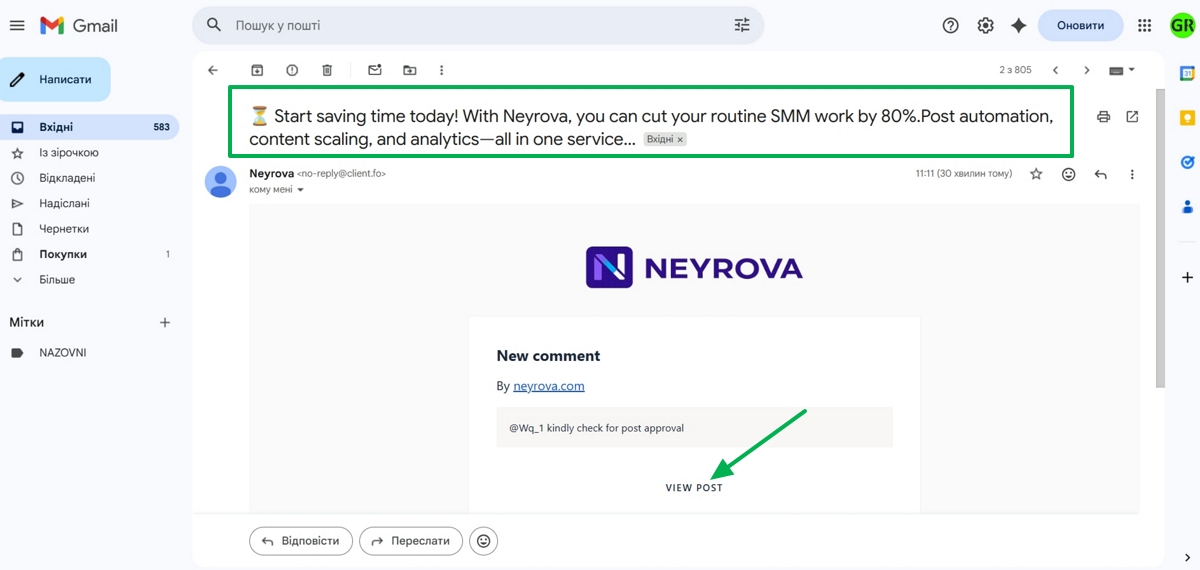
15. Open the Post from the Email
Click the link in the email notification.
Sign in to your Neyrova account.
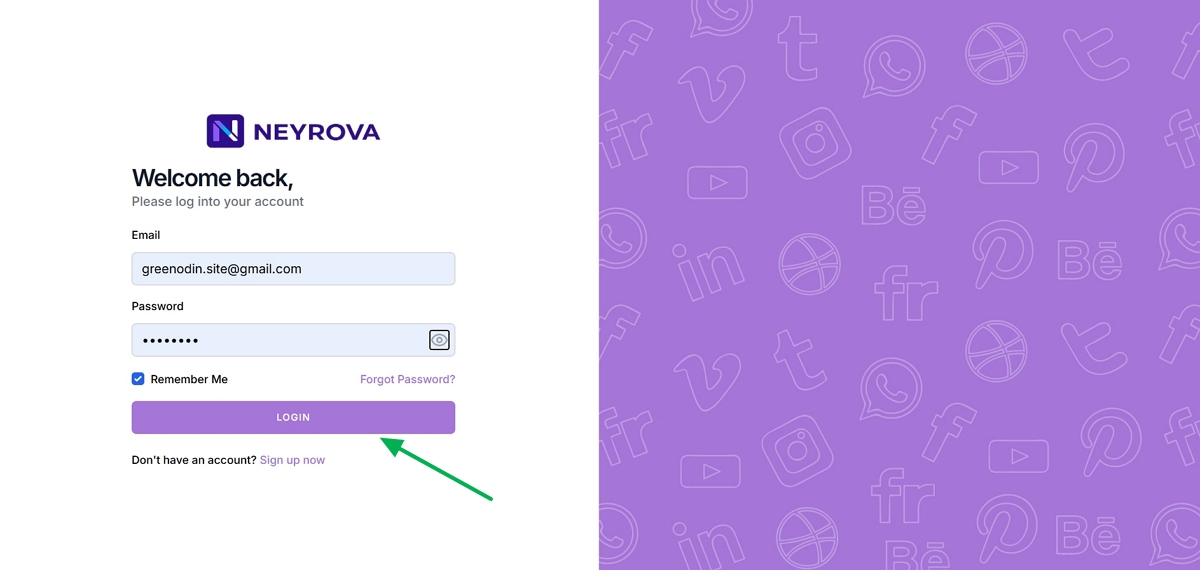
The corresponding post will open in Neyrova, where it can be reviewed, edited if necessary, and approved.

16. Collaborate with Your Team in Real Time
Team members can tag each other and leave comments directly on posts.
This makes it possible to discuss revisions without separate chats and keeps all communication attached to the relevant publication.
Summary
In Neyrova, you can build a team, assign roles, enable the Can Approve permission, and send posts for approval before publication.
The Activity feature allows team members to leave comments, mention colleagues, and quickly access posts through email notifications. This makes content collaboration more organized, efficient, and controlled.