How can you create labels for posts, add them to publications, and use them to filter your calendar?
This helps you stay organized and keep your content under control.
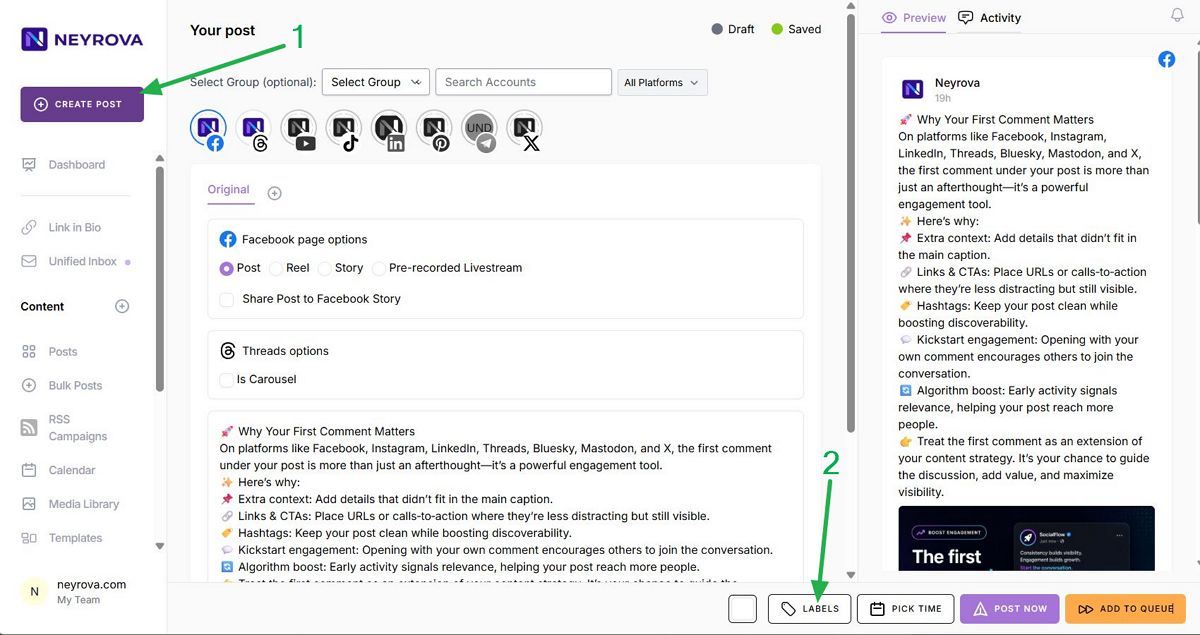
Let’s get started. In the dashboard, click Create Post.
Here, you can either create a post first and then add a label, or create a label first and apply it to a post afterward.
To create a label, click the Labels button.
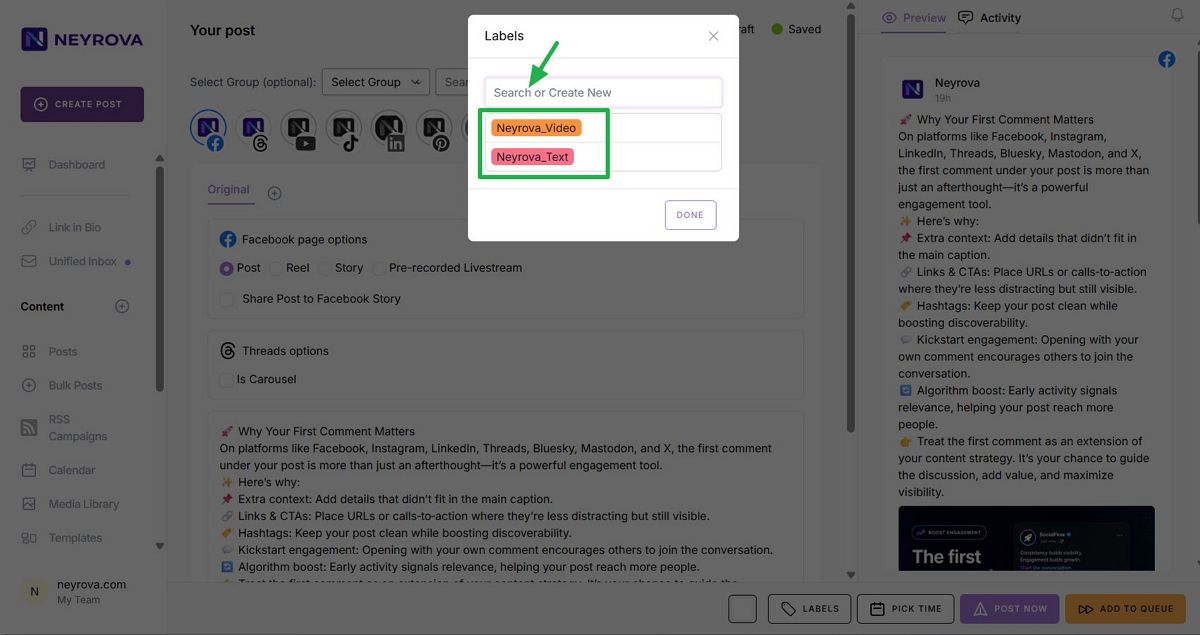
In the pop-up window, you will see existing labels and have the option to create a new one. Select an existing label or create a new one to tag your post.
To create a new label, start typing its name and click Done.
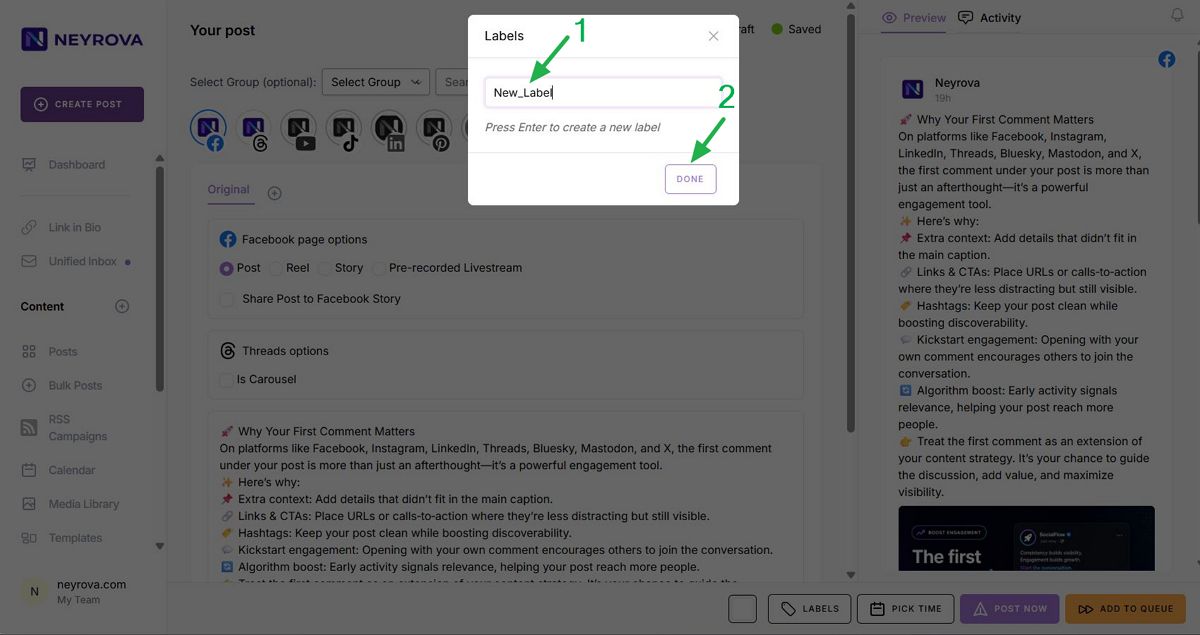
Once you create a label, it will automatically be applied to the currently open post.
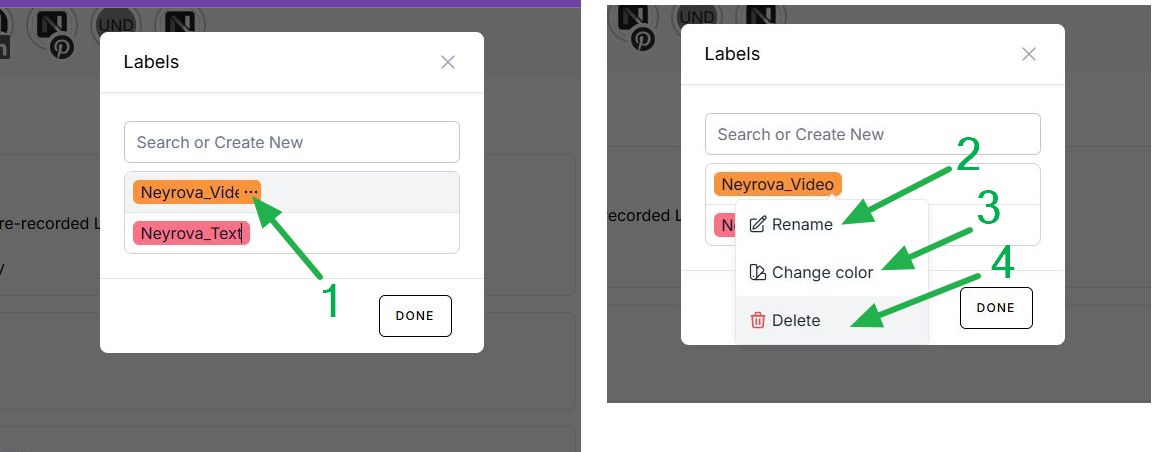
Open Labels again and hover over the desired label. Three dots will appear — click them. You can then change the color to make the label visually distinct, rename it, or delete it.
Done. You have successfully created a new label.
This label is automatically applied to the post that you started creating earlier.
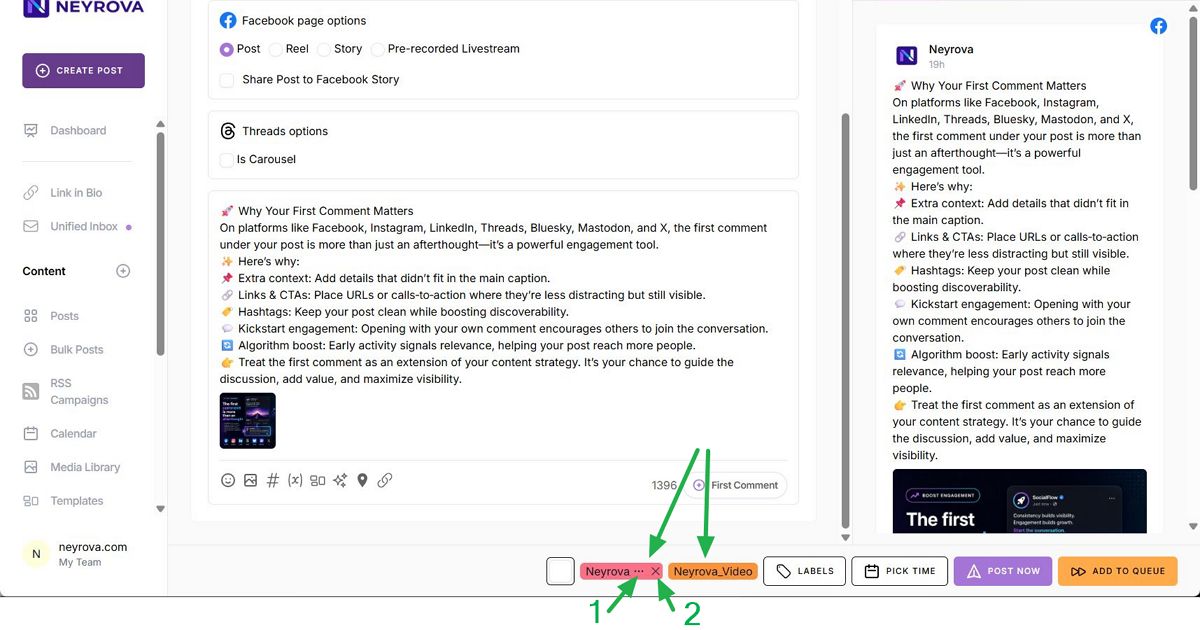
If needed, you can add multiple labels to a single post.
In the screenshot below, you can see that we selected two labels for this post. We can either remove a label or modify it by changing its color, renaming it, or deleting it.
Now let’s see how to filter the calendar using labels.
- Go to the Calendar section.
- Click Filters in the top-right corner.
- Select the required filters.
- Click Apply Filter to apply the filter. Only posts with the selected labels will remain visible.
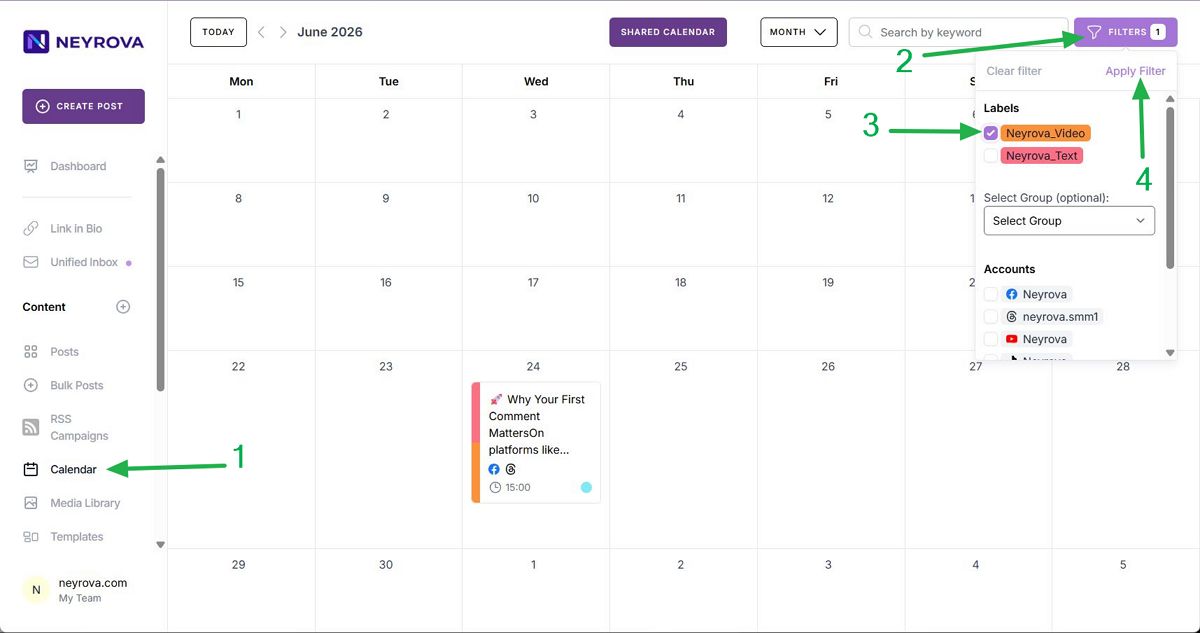
The calendar will refresh and display only the posts that match the selected labels.
This allows you to quickly find and manage specific types of content.
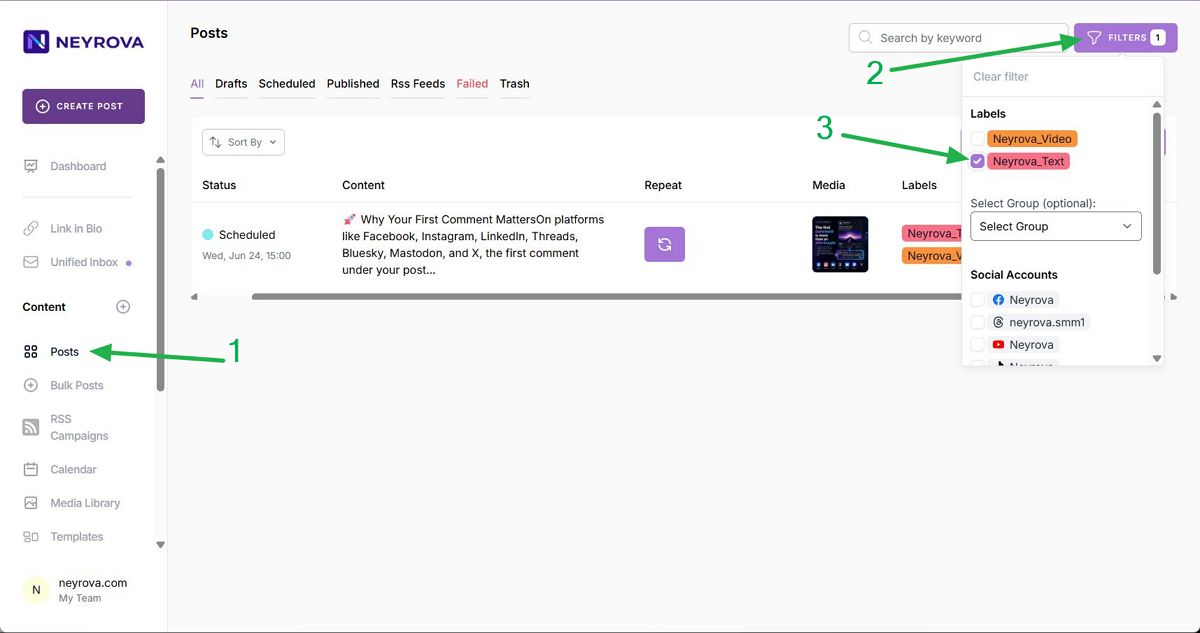
Using labels is also convenient in the Posts section:
- Go to the Posts section.
- Click Filters.
- Select the required filters.
Filtering is applied instantly, and only posts with the selected labels will remain visible.
This concludes the tutorial. Thank you for watching.